The ColorSynth DIY kits offer the opportunity to build ColorSynths into custom fixtures. Some users may want to drive an array of LEDs from a single ColorSynth to make the fixture brighter. To do this, all you need to do is duplicate the existing LED driver circuit (or build your own).

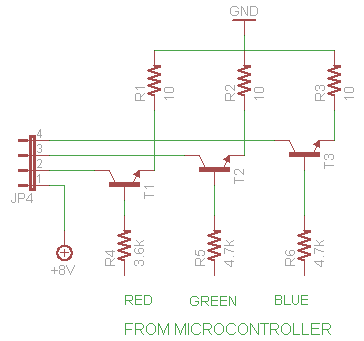
Above we see the LED driver circuit that the ColorSynth uses. JP4 is the four pin jumper that connects to the RGB LED included with the ColorSynth DIY kit and used in the construction of finished ColorSynths. Pin 1 is connected to 8V DC generated by an LM7808 regulator from the mainboard. Pins 2-4 are connected to the Red, Green, and Blue LEDs in the RGB LED. Each LED is driven by an NPN transistor that is in turn activated by a pin from the microcontroller, and sinks it’s current to a 1W 10 ohm resistor that is connected to ground.

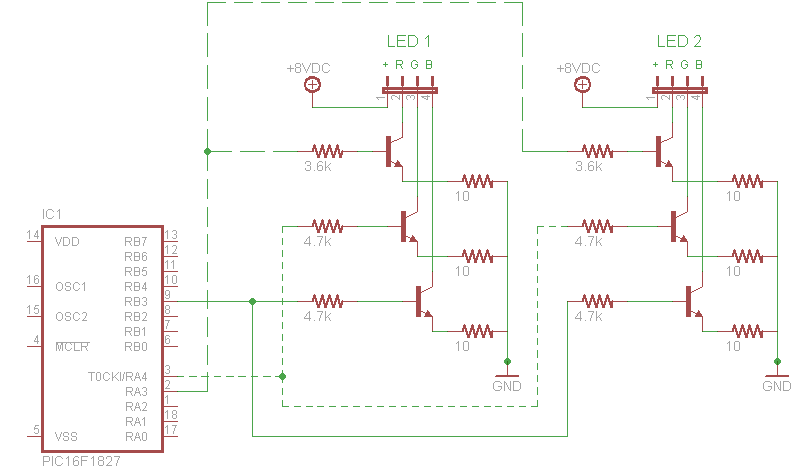
Above we see two of these same LED driver circuits, driven in parallel by the same pins on the microcontroller. Each pin can handle 20mA of current, which means you could run about 20 of these LED circuits from a single microcontroller with no issues.
It should be noted that chaining these circuits from the same pins means all of the LEDs will be synchronized. If you want to control the LEDs individually, they will need their own ColorSynth mainboards.
